Game Editor Manual Chapter 11
Previous (Pattern Layouts
)
The Pattern Editor
The Pattern Editor dialog can be invoked from the editor's main menu - click on the 'Tools' menu and select 'Pattern Editor...'.
Another way to open the dialog is to click on the 'Pattern Editor...' button in the 'Pattern Selection' dialog (see chapter 10).
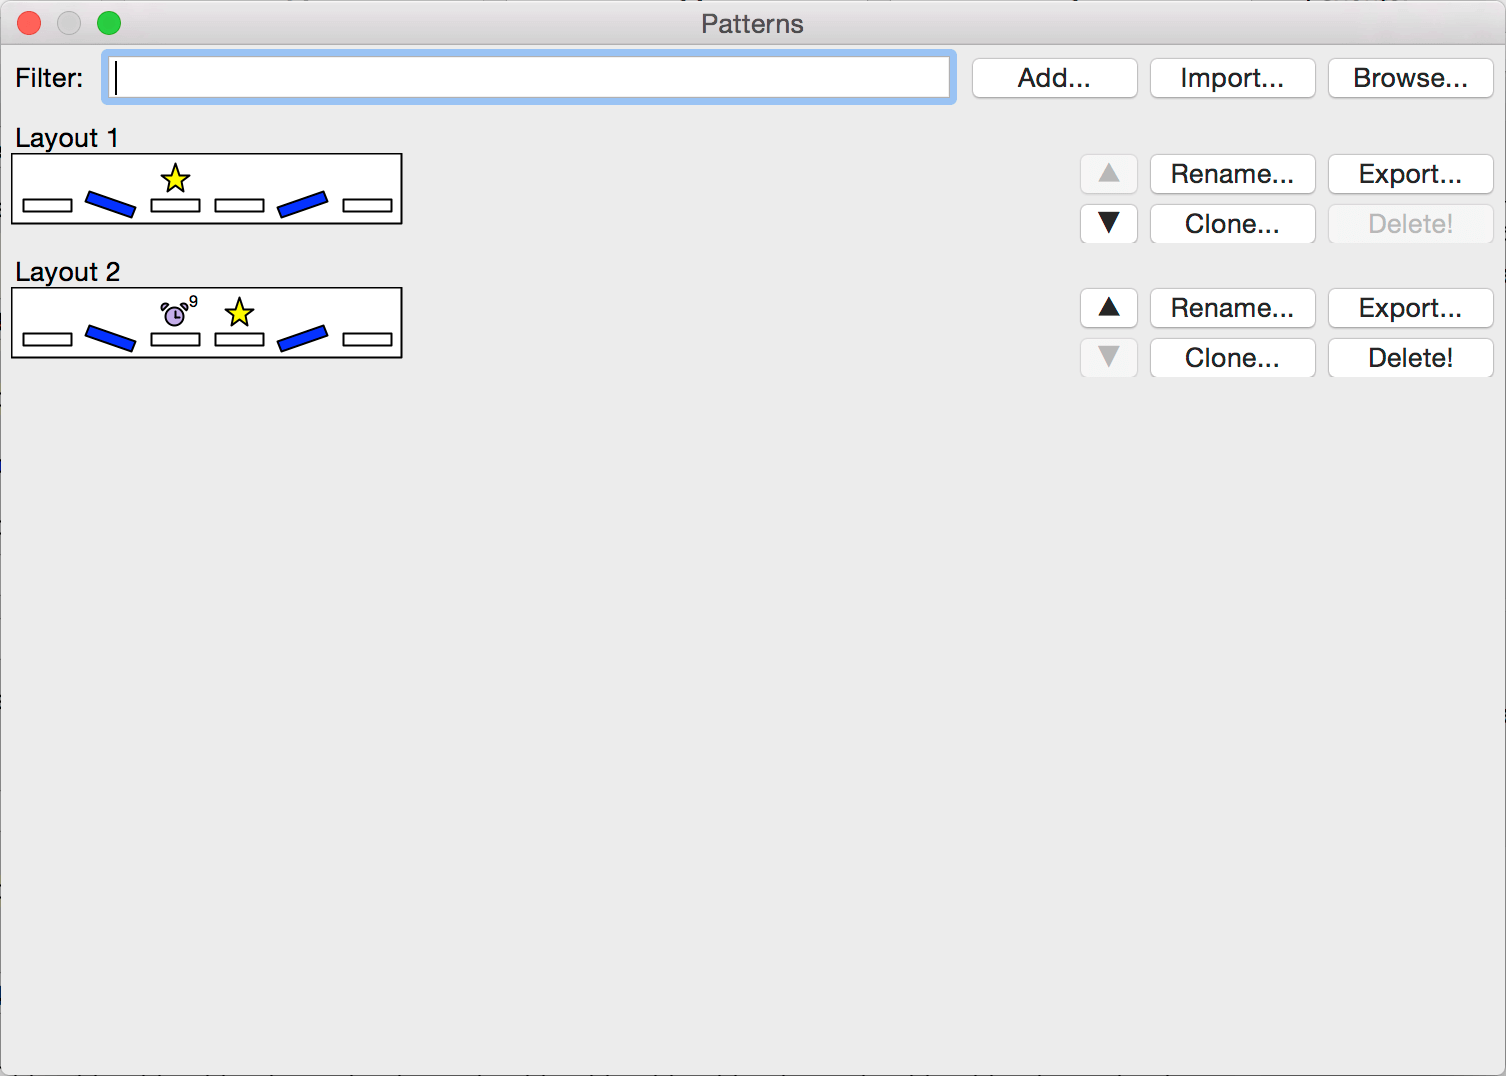
The 'Pattern Selection' and the 'Pattern Editor' dialogs look similar:
This can be a bit confusing especially if the Pattern Editor is invoked from the Pattern Selection dialog.
The 'Pattern Selection' dialog is used to select a pattern, the 'Pattern Editor' dialog is used
to edit and organize the patterns. Any change made to a pattern in this dialog will be automatically reflected in every pattern
layout that is based on the changed pattern.
The top part of the dialog consists of a text control and three buttons:
The 'Filter' text control allows you to quickly search for patterns containing the entered string in their names. The 'Add...'
button creates a new pattern, the 'Import...' button creates a new pattern and fills it according to the input string.
Every pattern has a string representation, which makes it easy to distribute them. The 'Browse...' button opens
an external browser and directs it to a web page with a list of patterns you might want to try out.
A list of pattern entries follows, a typical entry looks like this:
In the top left the name of the pattern is shown, followed by a rendering of the pattern. The two arrow buttons on the right side
allow you to change the relative location of the pattern within the list. The buttons are only active if no filter is applied
to the displayed patterns. Next to the arrow buttons there is a 'Rename...' button to change the name of the pattern, a 'Clone'
button to duplicate the pattern. The 'Delete' button deletes the pattern and is only active if there are no
pattern layouts based on this pattern. The 'Export...' button shows the string representation of the pattern (see the 'Import...'
button above).
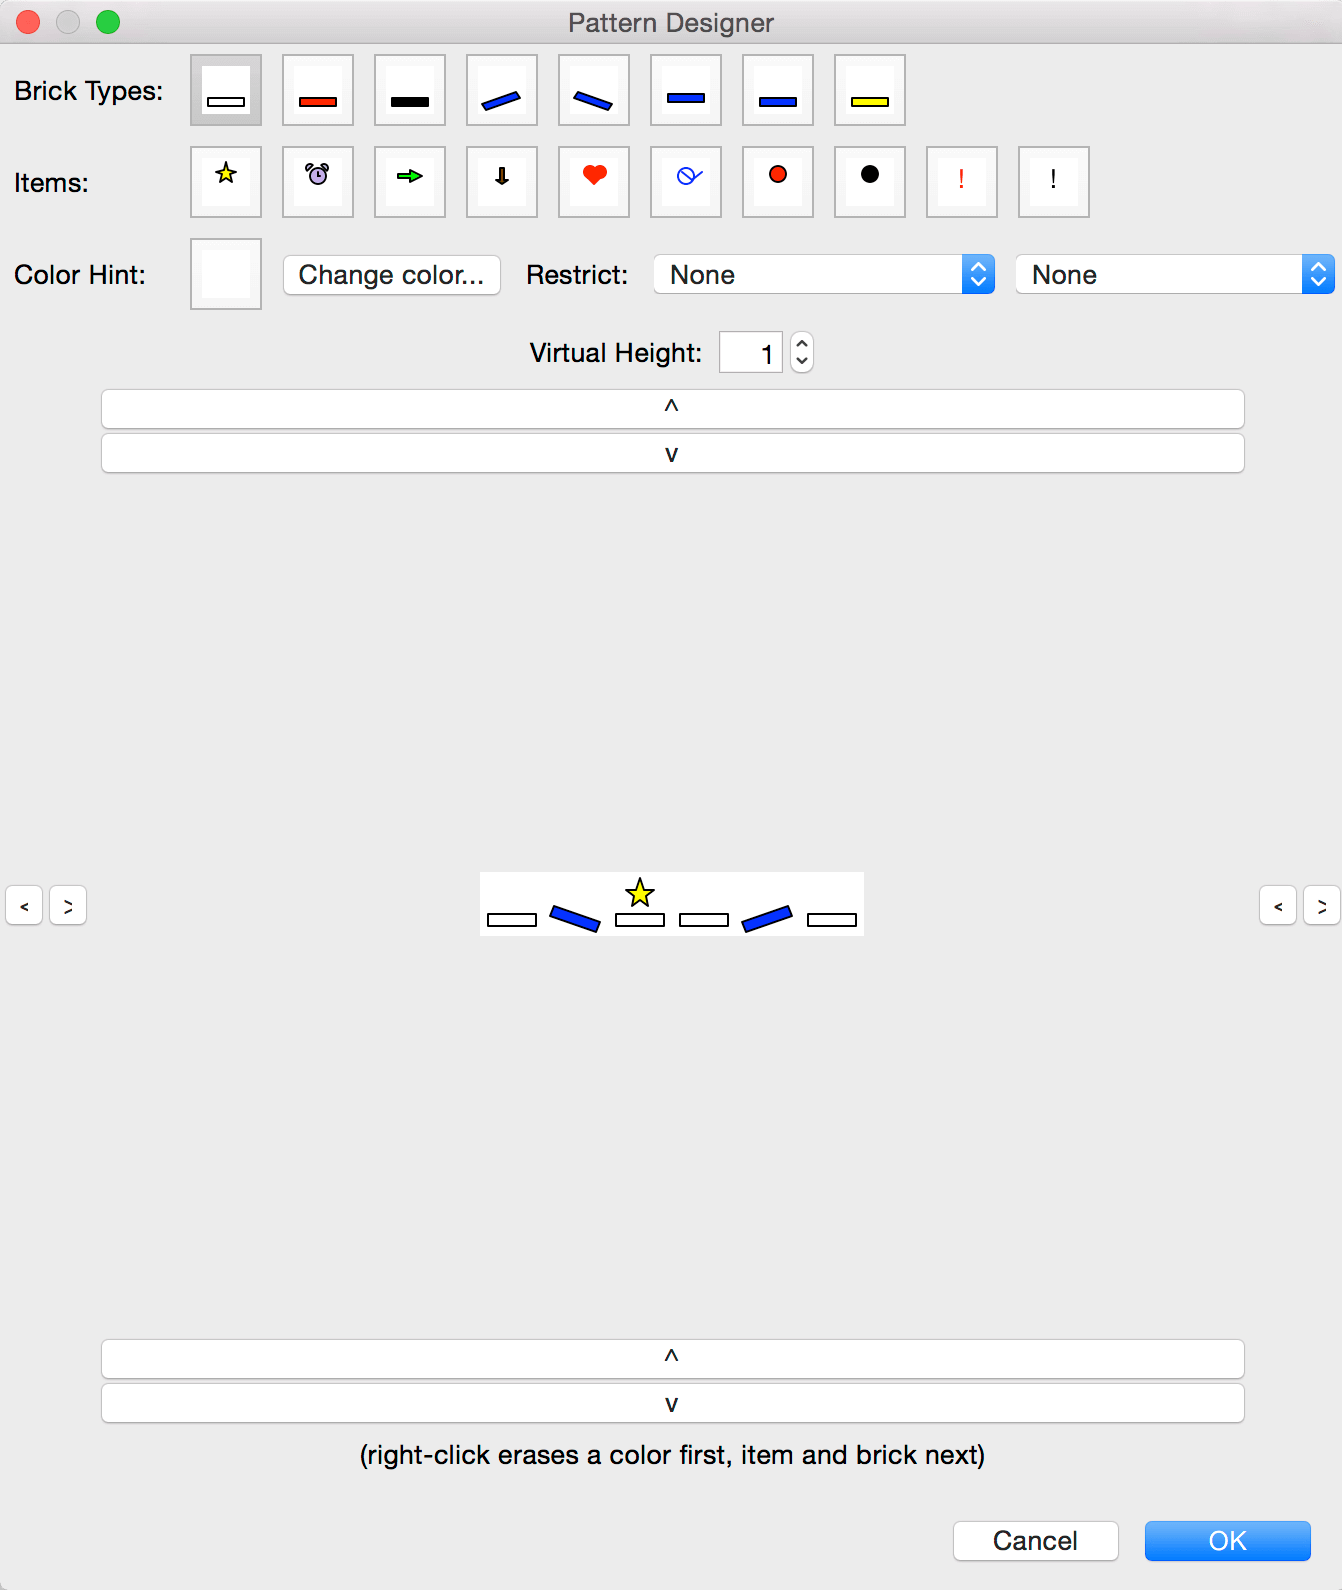
Clicking on the rendering opens the Pattern Designer dialog were you can modify the selected pattern:
The middle of the dialog showing the current pattern is surrounded on all four sides by a pair of buttons with arrows.
They allow to change the size of the pattern - the button pair on the top expands/shrinks the pattern from the upper side,
the button pairs on the left, right and bottom do the same on the corresponding sides of the pattern.
Left-clicking on a location in the pattern puts a tile, item or a color hint (explained below) on the given location, depending on the
current selection of the dialog. Right-clicking on a location deletes the color hint from that location. If there is no color
hint present, the item of the location is deleted. If there is no item at the location, the tile will be deleted.
The top of the dialog shows the available tile types:
Clicking on a tile type selects it (and deselects the previously selected tile type, item or color hint). Left clicking
on a location in the pattern will put the newly selected tile on that location.
The tile types are followed by the available item types:
Clicking on an item selects it (and deselects the previously selected item, tile type or color hint). Left clicking on
a location in the pattern will put the newly selected item on that location. Some items have properties you can change,
these will be blended in when the apropriate item is selected: for 'Jump++' and 'Speed++' it is the duration of this
power-up / handicap, 'Red Ball' and 'Black ball' allow you to specify how long the white tiles the balls
bounce on will remain discolored ('Ball Tail Length'), for 'Red Row' and 'Black Row' you can set how many times the
player will be warned before the entire row turns red or black ('Red/Black Row Warning Ticks') and how long it takes for the row to reset back to its original state
('Red/Black Row Cooldown Ticks').
Another element type that can be selected is the color hint:
Clicking on the empty button with a colored plain rectangle selects the color hint item (and deselects the previously selected tile type or item).
Left clicking on a location in the pattern will put a color hint item on that location.
A color hint is a simple sphere rendered above the tile in the game. Currently it is only used as a visual indication
in some of the tutorial levels (helps the player to figure out where to jump). You can set the color of the color hint
item (by clicking on the 'Change Color...' button) and restrict when the item may be generated (depending on the
number of collected stars and current health level).
The last setting in the Pattern Editor dialog is the virtual height of the pattern:
The virtual height is always larger than or equal to the current pattern height. When a new tile is generated
and the game picks a pattern, the pattern can be at most so tall so it fits into the current region, otherwise
another pattern layout is selected. The height that is checked is not the real height of the pattern, but its
virtual height. So if the region the pattern layout belongs to is for example 5 rows tall and the current
pattern layout has a height of 4 but a virtual height of 5, it is ensured the pattern will always be placed
on the bottom of the region. The one row above the real height can be filled with a single-row-pattern
or a classic layout.
Previous (Pattern Layouts
)